I made this blog just for show the process that i have followed to assemble this puzzle.
first of all, i need to say that english is not my mother tongue.
I bought the 4D Game of thrones cityscape puzzle in amazon, here is the link. Buy 4d Game of Thrones Westeros puzzle
It took me 14 días to assemble, I think is a little too much time for a 1400 pieces puzzle, but the overall outcome is great.
The Game of Thrones 4D puzzle
(Westeros)
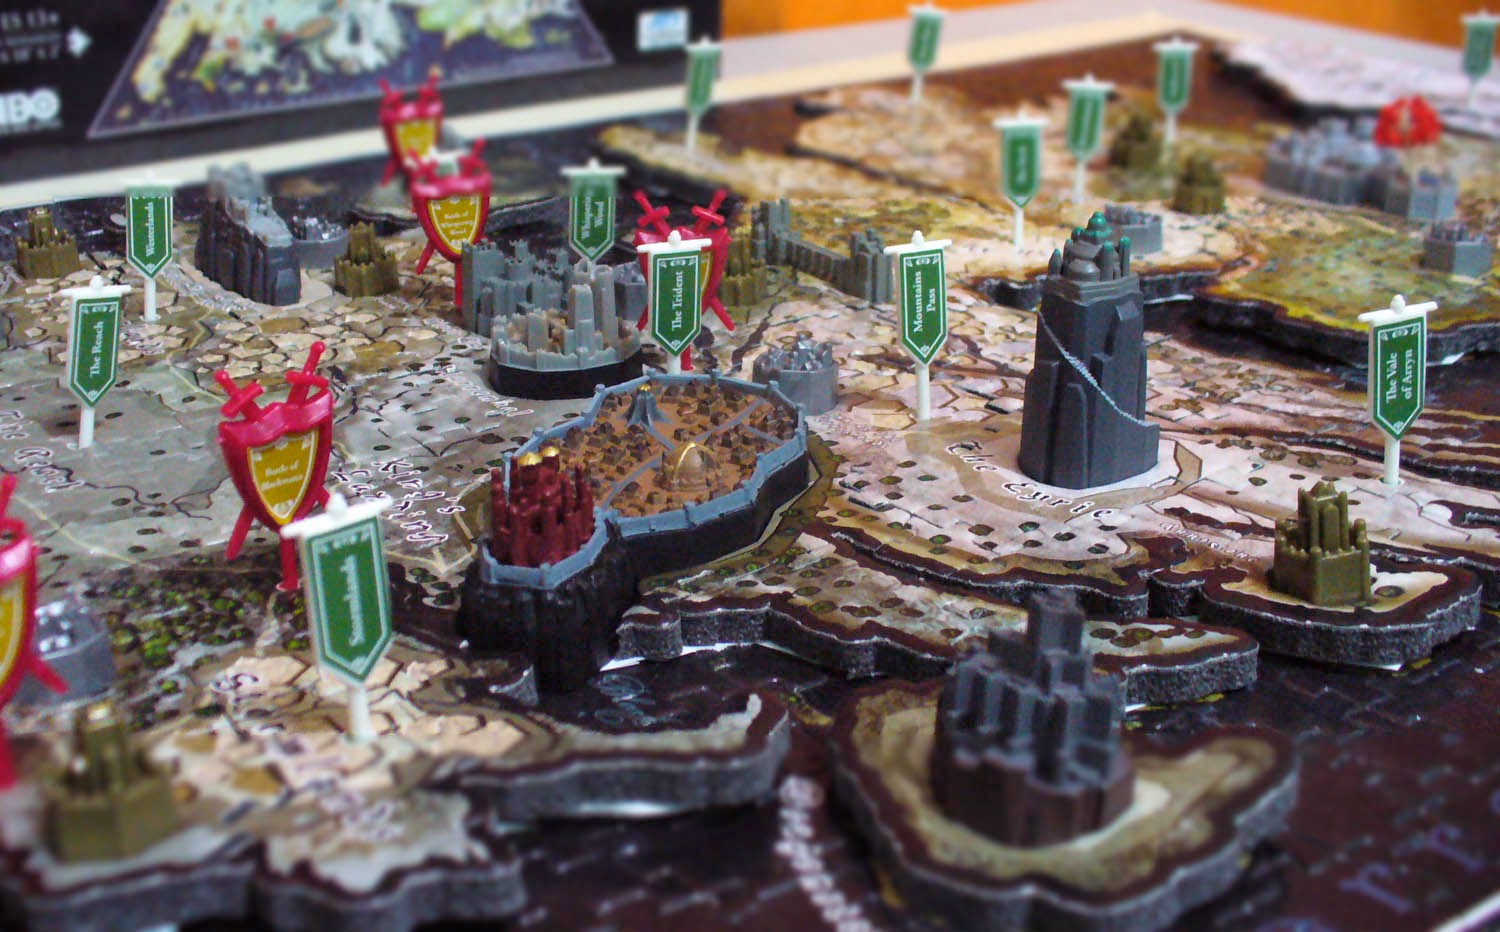
Draginstone, King's landing, The Eyrie and other castles
Winterfell, the Castle Black and the wall
Things you will need to assemble this thing, (at least i found this tools very useful)
Magnifying glass (because the guide image is too small)
hand lamp
glue
a lot of patience
a table or a place bigger than 30" X 11"
The magnifier and the guide image... and the very big magnifier
As you maybe know the puzzle is composed of 1400 pieces.
the first layer puzzle is 1000 pieces +-
the second layer is the one showing the landforms, is 355 pieces +-
there are several building, castles and villages
and the signals where you can read the place of battles and the name of geographic zones.
First thing i noted when unpacking the puzzle was that there almost only 3 colors on the first layer pieces, the "sea pieces" (black colored) and the "land pieces" (greenish/yellowish/babyshit colored), an the typical "border pieces" (black & white colored)
I must say that at first sight it looks kind of frightening and I thought "i'll finish the assembling process when winter comes and summer come again"
There is a video showing stills of the assembling process, you can see it here
Ok, I started trying to assemble the border, but this was the first puzzle in wich i found that was impossible for me to assemble it completely, so with almost all the border in place I decided to put together the northern part, that part is white and it was easy to build, sadly is a small part of the puzzle.
After finishing the northern part I followed this process to complete the assembling:
I separate the pieces by colors and then assemble the...
...pieces with "letters" (towns names or river names)
...pieces with "roads" (there are pieces with a white line crossing them, that's the kings road)
...pieces with rivers crossing them
...Pieces with mountains, with pines, with sand dunes, with grass, and the ones with nothing at all printed on them.
... pieces with ships
... pieces with islands
... the pieces with only sea (the hardest to put in place)
You can see i followed this order in the mentioned video.
A few words about the "sea", there are pieces with islands or ships or letters in them, those pieces are easy to assemble, the real problem are the "all blacks", let me tell you that there was a momment whith only 8 pieces without placing and I found that there was in fact 8 empty places in the puzzle but one "hole" not correspond to any of the pieces that i have available!
I was forced to remove several pieces from the "sea" (the "all black" ones showed in the above image) and start again the process to put them in place, but first i googled images of the assembled puzzle and i found this one.
....
Image that I found googleing for help
After manipulating the image, i was able to see almost all the sea pieces shapes, but most important, by manipulating the levels of the image i was able to see that those pieces were not completely black, I discovered there was air or ocean streams and waves drawn on them, so, with the help of that image, a magnifier glass and the hand lamp, I started to put in place those all black pieces, one by one.
The above image after manipulation, in the zone of the narrow sea you can see
the shape of almost all the sea pieces
and the "streams" over those pieces.
With the help of the magnifier and the lamp you will be able to see the direction of the waves and streams so you will avoid placing pieces in the wrong place.
Here are 8 pictures of all the puzzle and you will be able to see the shape of the "all black" pieces. i hope this can help you to finish this puzzle. (download images)
Just for the record, these are the 2 most dificult pieces to place (at least for me), I put those two pieces in several wrong places before finding their right place.
And thats all! I hope you enjoy putting together this puzzle with less suffering I went through!
Saludos desde México!
IF YOU FIND THIS BLOG ENTRY HELPFUL PLEASE LEAVE A COMMENT!